Momentum Realty Group
Carolyn Brown, Momentum Realty GroupPhone: (510) 882-3454
Email: [email protected]

DIY: Environmentally-Friendly Trellis

by Carolyn Brown 07/07/2020

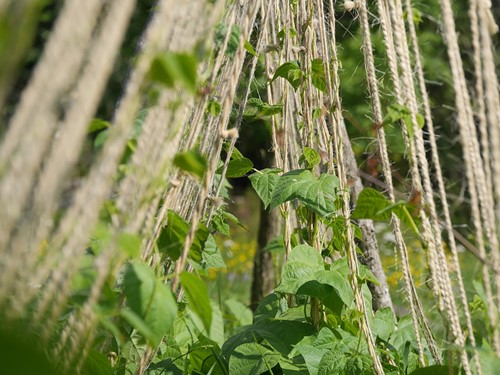
Image by Mark Dixon from Pixabay

Maybe it's time to get your garden ready, or maybe you already have a few scraggly plants that need some support; but pre-made trellises can be both pricey and flimsey.  Instead of spending a lot to get a product that will fall apart after one, wet spring, why not make this sturdy trellis that can be used for years to come?  If you follow these plans, your final trellis will be 4' 8" tall and 3' 7" wide, fitting well into a four-foot, raised bed and will cost less than $15 to make.  

Read on to learn how to make this inexpensive and environmentally-friendly trellis for your garden!

Materials:

  • Five, 1" x 2" x 8' boards
  • Small screws and nails
  • Four braces
  • Stakes made of rot-resistant wood, found at garden supply stores.  Redwood, cedar, cypress, hemlock or juniper stakes are good choices.
  • 100% cotton thread/yarn, 8 ply or similar

Directions:

  1. Cut four, 1" x 2" x 8' boards, dividing them into 3' 4" and 4' 8" pieces.  Cut the remaining 1" x 2" x 8' board into four equal pieces, each 2' in length.
  2. Set up on blocks or 2x4s and screw the 3' 4" and 4' 8" pieces together to make a rectangular frame, pre-drilling holes to prevent splitting.
  3. Attach braces at all four corners.  To make a brace, you will need to cut a small piece of wood that will fit into all four corners.  To learn how to cut off square, check out this short instructional video here, or you can purchase four, pre-made braces.
  4. Drill pilot holes to attach the redwood stakes to the bottom of the trellis and screw together with significant overlap but enough to allow the stake to stick out approximately 6" below the trellis.  
  5. Drive small nails into the trellis frame at 6" intervals such that approximately 1/3" still sticks out of the wood.  Omit nails at the four corners.
  6. Tie the thread to the lowest nail on your frame and extend to its companion nail on the other side.  Pull the thread upwards to the next nail on the same side of the frame, then extend across the frame again.  Continue with this pattern until you have thread extended horizontally all the way up your trellis.
  7. When you reach the top, extend your thread from the last nail along the sides to the first nail at the top of the trellis, such that your thread lines up to the brace.  Repeat the process again, pulling the thread vertically this time.  At the end of the process, you should have a 6" x 6" grid throughout your trellis.
  8. Repeat steps 1-8 to create a second, identical trellis.
  9. Take your first trellis and place it in its intended location.  Then, gently hammer at the top so that the stakes are driven into the dirt.  Take your next trellis and measure two feet away from your first.  Hammer it in as previous.
  10. Drill pilot holes and attach the trellis frames together with one of your 2' pieces of wood near the top of the trellis.  Repeat on the opposite side.  If desired, attach the trellis frames together a second time, 2' lower on your frame, using your remaining two, 2' pieces of wood.
  11. Weave any existing plants into the structure of your trellis.
  12. When growing season is over, simply cut the string away from the frame and compost the 100% cotton string and plants together!  You can unscrew the 2' pieces to lay your trellis flat for winter storage or keep it in place in your garden for next year.
About the Author
Author

Carolyn Brown

Hi, I'm Carolyn Brown and I have over 20+ years of real estate experience, serving Bay Area Counties: Alameda, Contra Costa, Solano, Sonoma, Sacramento, and Central Valley. I have a Master's Degree in Psychology and I work part-time for West Contra Costa Unified School District. This has afforded me the opportunity to connect with families and communities.  

I have always been a giver and compassionate about serving and helping others. A real estate career was never my goal but the passion I have to help others changed that and I would love to help you! Whether you're in the research phase at the beginning of your real estate search or you know exactly what you're looking for, you'll benefit from having a real estate professional by your side. I'd be honored to put my real estate experience to work for you.  

If credit is an issue, please don't let that discourage you. Having excellent credit is a work in progress but definitely workable. SmartCredit is an inexpensive App that will help you get on track and keep you on track. If you are proactive and willing, this can work for you. Sign up at: www.smartcredit.com/Chewzcarolyn.  

Also, I am an author. My book, "S.O.U.L Inspiration 4 Life Daily Word" is guaranteed to inspire you and encourage your soul. Giving up isn't an option, and if you desire to become a homeowner, then contact me and I'll show you how. Never let what you see, hinder what you believe. My wonderful book is available online at Amazon.com, Barnes and Noble, and Xulon.com. Let me know if you have any questions. Let's build a legacy together.  

Thanks for ChewzingCarolyn!!!